The most valuable marketing channel for print studios and artists, putting your email list to work, and how to import it into Facebook as a custom audience.
That’s a good question, but let me start by asking a different one.
What Is Your Most Valuable Marketing Channel?
Can you answer that question immediately?
While your answers may vary depending on your unique business situation, email marketing should be, according to just about every marketing study out there, at the top of the list.
Most of the studies, polls, and case studies out there pretty much all list Email Marketing at the top or at the very least in the top three most valuable marketing channels available today.

Pro Tip: You need to be growing your email list.
What most of the those studies tend to omit however is that your email list provides other great opportunities aside from just email marketing.
Yep, think native Americans and the buffalo. You need to use every part or in this case, opportunity.
One such opportunity and the subject of today’s post is how to leverage your email list for laser targeted ads on Facebook – by the way, you can do this on Twitter and other platforms as well.
Today, we are going to focus on Facebook.
We have been spending a fair amount of time on the blog lately covering advertising on Facebook.
Our first two posts have been geared towards giving you the information and the steps you need to setup a checkout goal on Facebook and how to install a re-marketing pixel on your Art Storefronts site.
Those are the first two legs of the stool and today is number 3.
With all three in place, you will have the proper foundation necessary to start advertising on Facebook and do so successfully right out of the gates.

We are not talking about spray and pray over here or boosting posts. Zuckerberg has enough $ as is without you giving him any more of it.
If you are going to advertise on Facebook the key is laser targeting your campaigns and knowing how to measure success.
So let’s complete the stool.
How To Import Your Email List in Facebook and Create a Custom Audience
Step 1: Export your email list and get it all together in a spreadsheet or document. Does not matter what size it is or what shape its in. The bigger it is the better.
So export out of your contact manager, gather your business cards, scrape your personal email, even grab friends and family.
Remember this is Facebook, you are not just advertising for the sale but you are also advertising for shares and likes! Both of which can lead to future sales.
Step 2: Login to Facebook and get into your ads manager (if you have not done this yet reference this post).
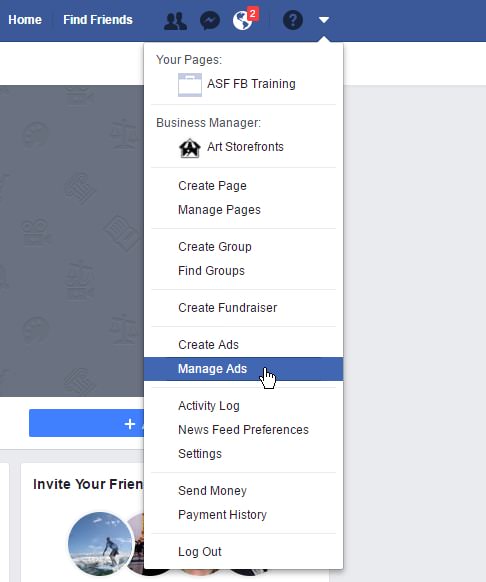
Step 3: Click on the “Ads Manager” icon ☰.
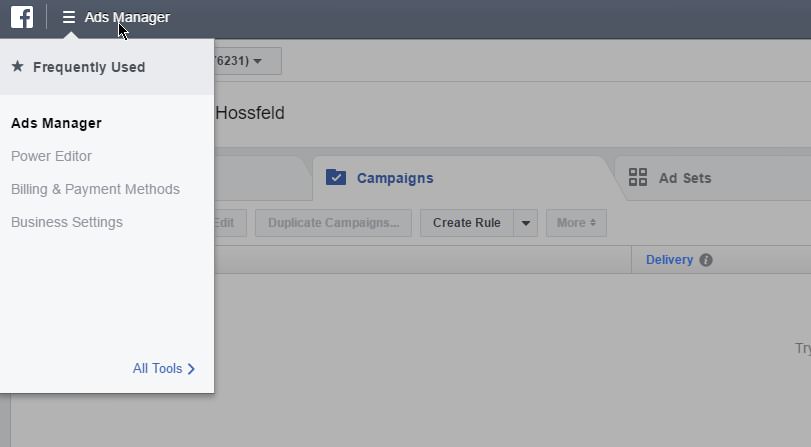
Step 4: Click on “All Tools” and then click on “Audiences” under the “Assets” category.
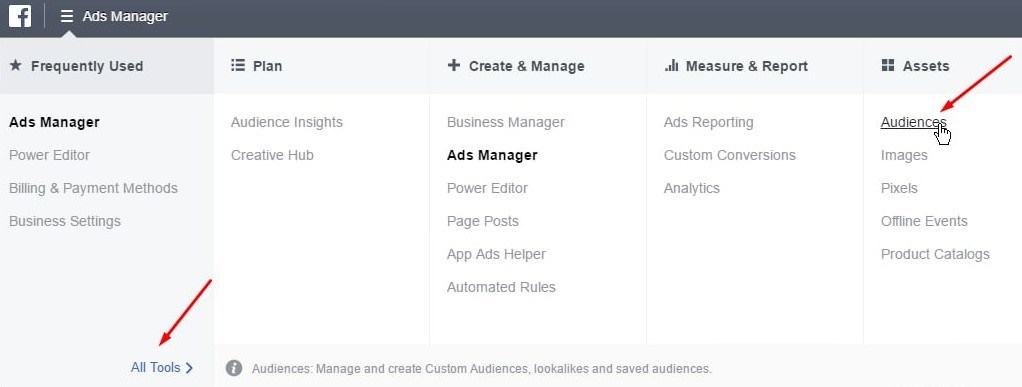
Step 5: Click “Create Audience” in the upper left hand corner.

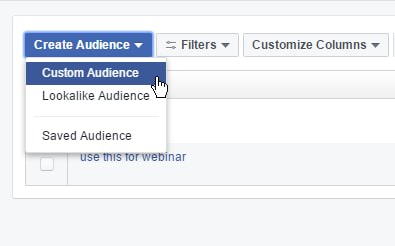
Step 6: Select “Custom Audience” from the drop down menu.
Step 7: Click on “Customer File.”
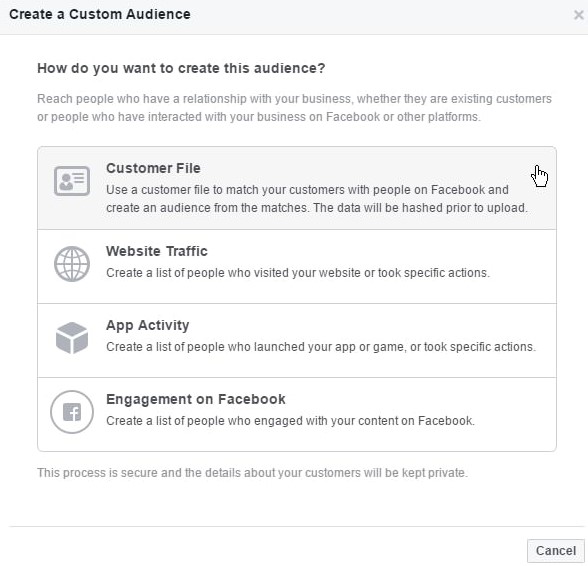
Step 8: Then, click on “Add customers from your own file or copy and paste data.”
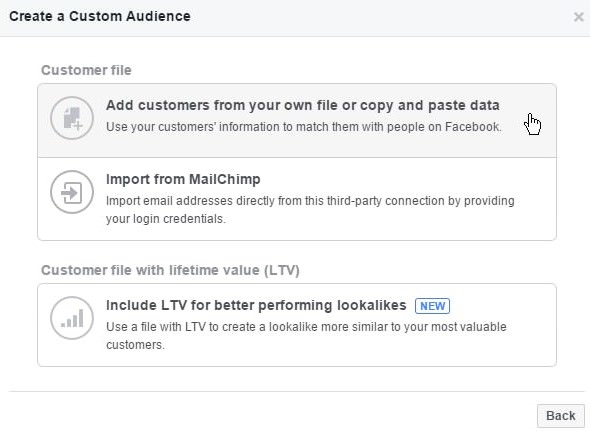
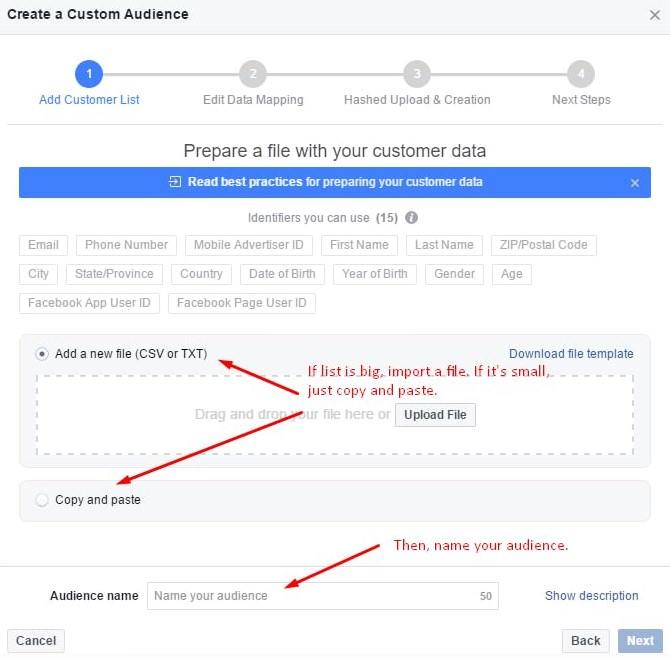
Step 9: You can upload a file if you like or you can copy and paste.
If your list is huge better upload. If not copy and paste will do just fine. Paste it in and create audience.
After uploading your customer information, name your audience something you will remember.
Pro Tip: This needs to be a regular repeated activity. Get more emails and import them in batches as you go.
Next Steps For Facebook
Nice work, your stool is now complete!

Now comes the fun part.
Time to start remarketing.
We explain how to get started in this setup guide.


